How to Use Eyelash Curlers
Follow this step-by-step guide on how to use eyelash curlers, with top tips for how to use an eyelash curler & perfect your eye makeup.
- 12th February 2018
- By Charlotte Tilbury
2 minute read
Follow this step-by-step guide on how to use eyelash curlers, with top tips for how to use an eyelash curler & perfect your eye makeup.
2 minute read
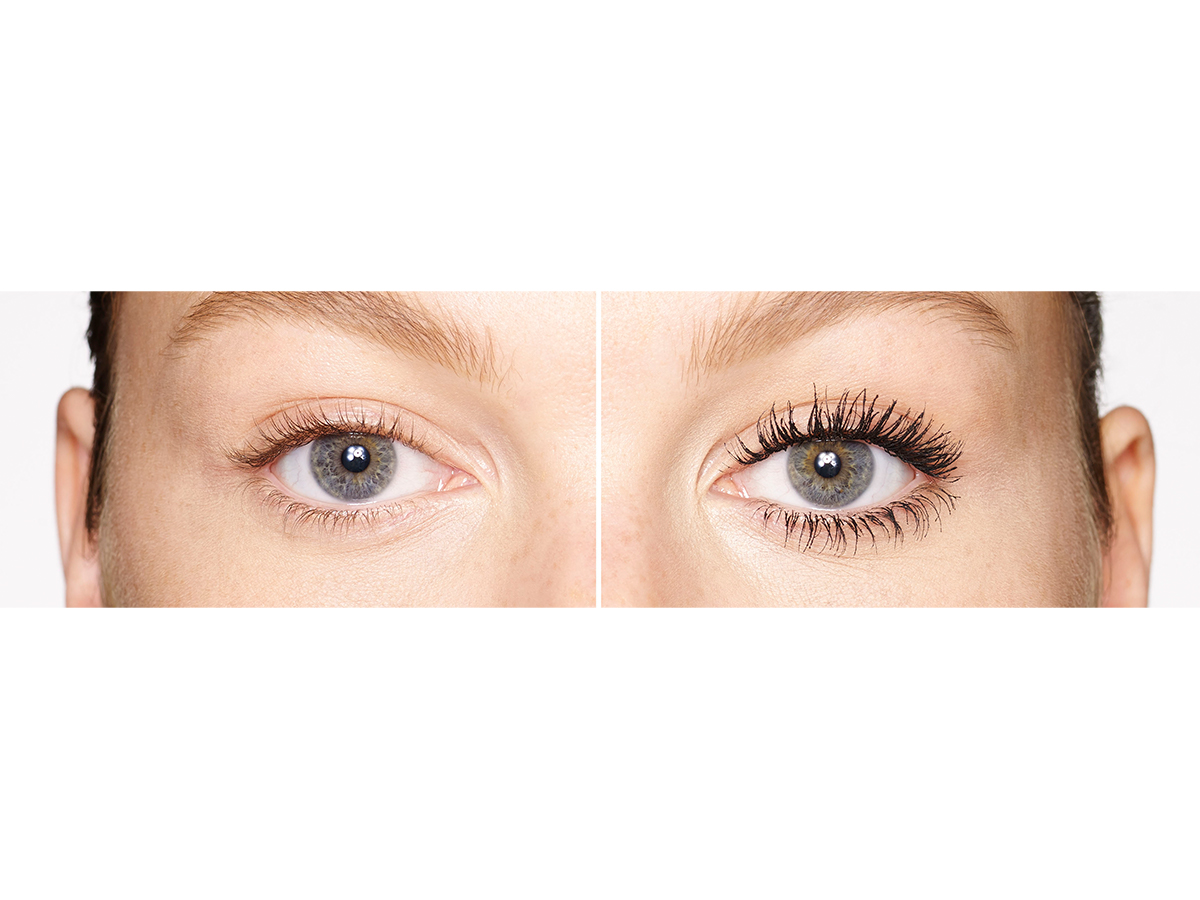
The key to long fluttering eyelashes is all in the first steps. Today we’re showing you how to use an eyelash curler so that you can make the most of your makeup. An eyelash curler is essential to any makeup bag, because it acts as a push-up bra for your eyelashes. When you apply mascara after using eyelash curlers, you’ll instantly notice the difference it makes to your eye makeup, as your lashes will appear longer, and lift your whole eye area. An eyelash curler may look unusual, it is very simple to use, so we have put a quick step-by-step guide together to help you in your quest for longer, lifted, gorgeous eyelashes!
Shop Life-Changing Lashes Eyelash Curler

Ensure you have clean, dry lashes before using an eyelash curler; if you already have mascara on this could break your existing lashes. Charlotte's Take It All Off makeup remover is perfect for removing stubborn, waterproof makeup, conditioning the lashes and preparing them for a new coat of mascara.

To curl your lashes, reach for the Life-Changing Lashes eyelash curler! As you're about to curl your lashes, find the perfect position for your lash curler by keeping your eyes open and holding it so that your top lashes fit between the two edges.
When you're ready, gently clamp the eyelash curler together, as close to the root of your eyelashes as you can get without it feeling uncomfortable. This will help to add length, volume and curl to your eyelashes instantly!
Hold for 5 seconds, and repeat on the other eye. You can repeat as often as needed, but this should be enough time for a lifted-looking lash.

Once you've curled your lashes with the Life-Changing Lashes Eyelash Curler, finish your lash look with your favourite mascara. For a glossy, fanned-out look, apply Full Fat Lashes mascara, or for volume that makes you look wide awake, choose Legendary Lashes Vol 2 mascara. If you're looking for length and lift, apply Pillow Talk Push Up Lashes! mascara for a 24-hour vertical lift effect!
Item 1 of 29

€27.00
Item 2 of 29

€43.00
Item 3 of 29

€34.00
Item 4 of 29

€10.00
Item 5 of 29

€41.00
Item 6 of 29
Item 7 of 29

€20.00
Item 8 of 29

€59.00
Item 9 of 29

€25.00
Item 10 of 29

€25.00
Item 11 of 29

€32.00
Item 12 of 29

€32.00
Item 13 of 29

€45.00
Item 14 of 29

€45.00
Item 15 of 29
Item 16 of 29

€125.00€118.75
Item 17 of 29
Item 18 of 29

€111.00
Item 19 of 29

€89.00€80.10
Item 20 of 29

€104.00€98.80
Item 21 of 29

€70.00€66.50
Item 22 of 29
Item 23 of 29
Item 24 of 29
Item 25 of 29
Item 26 of 29

€27.00
Item 27 of 29

€26.00
Item 28 of 29

€45.00
Item 29 of 29
With over 30 years experience, Charlotte Tilbury MBE is the world's number 1 makeup artist and British beauty entrepreneur. Charlotte established Charlotte Tilbury Beauty in 2013, which is now a record-breaking beauty brand that has won over 400 awards.


