Eye Makeup + Eyeliner for Hooded Eyes

Discover beginner-friendly tips and tricks on applying eyeshadow and winged eyeliner for hooded eyes including advice on how to create my signature Feline Flick.

Darlings, no matter your eye shape, everyone, EVERYWHERE can create mesmerising eye looks! If you have hooded eyes, you may find creating eyeliner looks a bit tricky, but read on to discover my expert tips and tricks on applying eyeshadow and eyeliner for hooded eyes to create eye-enhancing liner looks that don’t transfer, smudge or disappear! Even if you're a makeup beginner, you can use my tips and tricks to create a gorgeous winged eyeliner for hooded eyes!

What are Hooded Eyes?

If your eyelids are being hidden by a natural fold in the skin, this is what’s referred to as having hooded eyes. Some people are born with hooded eyes, and some people’s eyes become more hooded with age as the skin around the eyes begins to droop. Since the folds act as hoods for your eyes, this can be problematic when applying eyeliner as it often don’t create the desired effect, or it can be more difficult to perfect.

Hooded Eyes graphic

Typical issues people with hooded eyes run into when applying eyeliner is their eyeliner being overshadowed and hidden by the folds around their eyes, smudging and transferring onto other areas of the eye, and difficulty creating the perfect wing.

Darlings, with my expert tips and tricks, you can discover how to apply eyeliner for hooded eyes so even makeup beginners can create a classic eyeliner look!

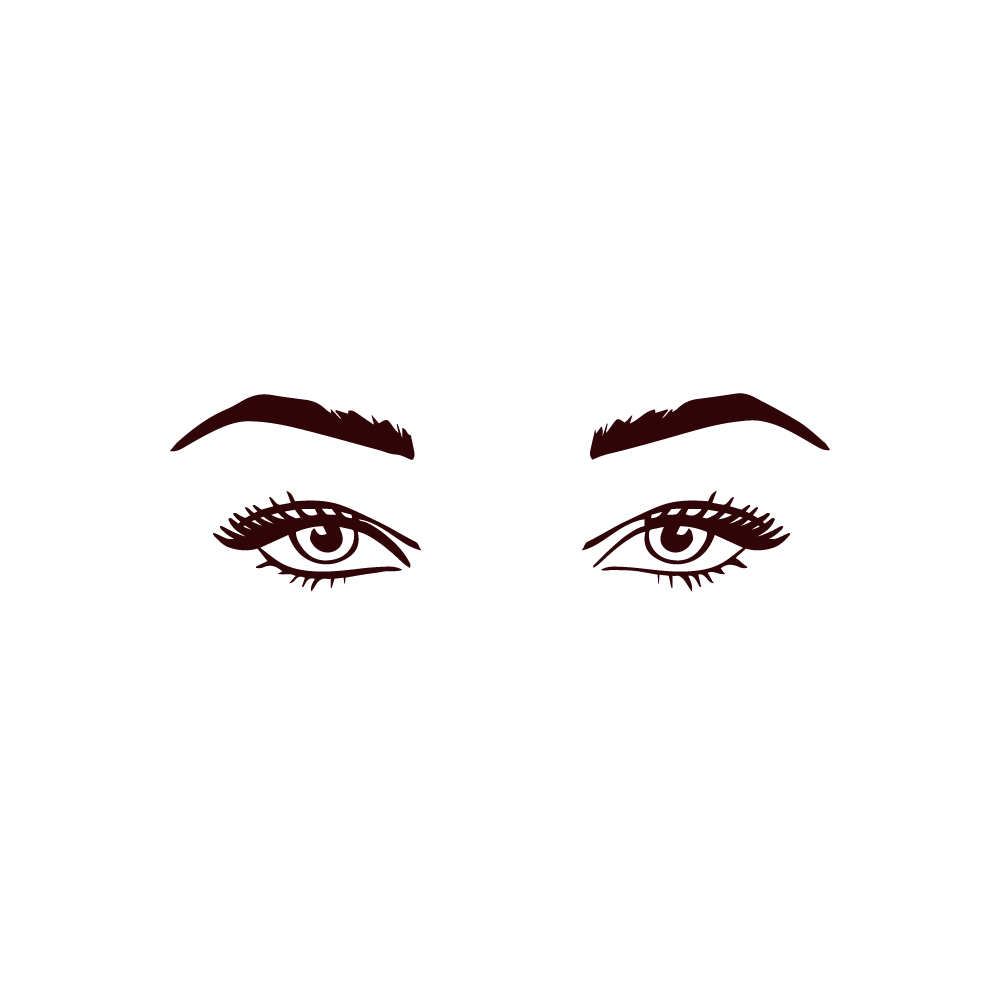
Winged Eyeliner for Hooded Eyes: Beginner Tips and Tricks

If you’re looking to create a fabulous feline flick, discover my expert advice on how to apply eyeliner for hooded eyes! With the right tools and techniques, it’s easy to give hooded eyes the classic winged eyeliner look!

Pillow Talk Eye Makeup for Hooded Eyes still life

MAGIC TIP #1: Rest your Eyes

Keep the eyes naturally rested without raising your eyebrows or stretching your skin. Moving the folds in your eyes may give you a smoother surface to work on, but the wing that you create will become invisible or off-set when your eyes return to their natural position.


MAGIC TIP #2: Less is More!

On hooded eyes, keep your eyeliner application as thin as possible. For eyeliner to be visible on hooded eyes, the focus should be on precise, well-defined placement that accentuates the look of the eyes without getting lost. Apply your eyeliner in a thin line, as close to your lash-line as possible for best results. Applying more product also increases the risk of transfer onto other parts of the eye, so keep your liner clean and concise!


MAGIC TIP #3: Make It Last

Use a long-wearing eyeliner that doesn’t smudge. The Feline Flick is a waterproof, ultra-matte formula that’s perfect for creating liner looks that last.


MAGIC TIP #4: Don’t Be Afraid to Wing It Out!

Looking straight forward, don’t be afraid to follow along the lower lash line and extend your eyeliner to cheat a feline effect. Use the tail of your brow as a template, gliding your eyeliner upwards and outwards until it aligns with the tip of your brow.


MAGIC TIP #5: One at a Time

Complete one eye before moving on to the next. This will help with the overall symmetry of your look and gives you a template to mirror on the other side of your face.


MAGIC TIP #6: You Can Always Clean Up Eyeliner Mistakes!

If you make a mistake with your eyeliner, you can use Magic Eye Rescue and a cotton bud to clean up the surrounding area. Glide the cotton bud along your eyeliner to remove any smudges and sharpen up the lines you’ve created to keep your eyeliner looking flawless.

Winged Eyeliner for Hooded Eyes Tutorial

  1. Eye graphic showing how to apply eyeliner for hooded eyes

    Step 1: Assume the Perfect Position for Applying Eyeliner

    Before you begin applying eyeliner, position yourself in front of a mirror and relax your face. The best way to apply eyeliner is with a natural facial expression. Look forwards without raising your eyebrows or stretching your skin and visualise where the most flattering eyeliner placement will be for your hooded eyes. My perfect eyeliner placement is to follow an invisible line from the lower lash line up to the tail of the brow - this is the perfect guide for every winged eyeliner look!

  2. The Feline Flick liquid eyeliner with a precise pen tip perfect for winged eyeliner

    Step 2: Flick Upwards and Outwards from the Outer Corner

    Taking The Feline Flick, my precision-tip liquid eyeliner, draw a thin line that travels from the outer corner of your eye, gliding diagonally to create a lift-effect liner that goes upwards and outwards. The line should be straight rather than curved to create a sharp and precise angle that will become your wing.

    Winged eyeliner is an optical illusion! If your eyes have deeper folds that disguise the outer corner, glide your eyeliner over the top to map out where your winged liner will sit. Keeping your eye in a natural position will help you here as it will reveal the natural folds that you’re working to counter.

    Shop The Feline Flick

  3. The Feline Flick liquid eyeliner in Panther with cap on

    Step 3: Join your Feline Flick with your Lash Line

    To complete the shape of your winged eyeliner, trace a line from the tip of your wing that connects back into the lash line. You’ll want to follow a similar angle to the first line, starting at the outer-most point and landing nearer towards the middle of the eye. Keeping your eyeliner thin and slick will define the look of your eyes while also minimising the risk of your liner drowning out the look of your hooded eyes and colouring them in fully without accentuating their shape.

  4. An open, mirrored-lid, 6-pan eyeshadow palette in shimmery and matte nude shades.

    Step 4: Fill in the Empty Space

    Once you’re happy with your feline flick, take your liquid liner and black out the centre of your wing. Use an opaque, lacquered eyeliner like The Feline Flick to do this step to get the most precision and definition out of your eyeliner look, and when applying, be careful to stay inside the lines you’ve created to form the sharpest eyeliner look you can.

    Tilbury Tip: If you are worried about transfer, I’d recommend using the Super Nudes Easy Eye Palette to set down your eyeliner. With my Eye Liner Brush, use the black shade in this magically matte eyeshadow palette and tap off any excess, then pat the colour on top of your liner to mattify and build up even more opacity.

    Shop Super Nudes Easy Eye Palette

  5. Model wearing a winged eyeliner look using The Feline Flick in Panther

    Step 5: Draw a Thin Line from the Inner Corner

    Connect your winged eyeliner and your inner corner by running your eyeliner across the lash line. Using the precision tip of The Feline Flick, glide the liquid formula across the upper lash line from the inner to the outer corner, staying as close as possible to the root of the lashes. This will help to accentuate the look of the eyes and ground your winged liner into your eye look, while being mindful not to overwhelm the eyelid and get lost under the hood.

    Shop The Feline Flick

  6. Mascara in a pink-coloured tube with its gold-coloured lid with a black applicator next to it.

    Step 6: Finishing Touches

    Are you happy with your winged eyeliner, darlings? If not, you can always use a cotton bud and Magic Eye Rescue to remove any makeup mistakes, or Charlotte’s Beautiful Skin Radiant Concealer to tidy up any lines that have been led astray!

    When you’ve perfected your winged liner, finish the look by applying a brightening eyeliner like the nude shade in The Super Nudes Duo Liner to the waterline for bigger and brighter -looking eyes, as well as lashings and lashings of Pillow Talk Push Up Lashes! mascara on the top and bottom lashes for the look of enhanced length, lift and volume!

    Shop Pillow Talk Push Up Lashes!

    Shop The Super Nudes Duo Liner

Discover More Beginner-Friendly Tips on Eye Makeup for Hooded Eyes

  1. Charlotte's Supermodel Brow Kit includes a tinted brow gel, eyebrow pencil and clear fixing gel

    1. Enhance Your Brows

    To lift the look of your eyes, create a SUPERMODEL BROW! It’s as simple as FILL, FEATHER, and FIX! Thicker, fuller, fluffy looking, brows will instantly make eyes appear uplifted, brighter, and more open!

    First, create shape, structure, and define the look of your brows with Brow Lift, or use Brow Cheat to fill in gaps and elongate brow structure by mimicking hair-like strokes. Next, add the appearance texture and tint for fuller-looking brows with Legendary Brows, an expert tinted brow gel. Coat and define every hair (including tiny baby hairs!) by brushing in upward motions. Lastly, set your brow in place with Brow Fix, a clear brow gel that delivers hold with invisible finish.

    Shop Charlotte’s Supermodel Brow Kit

  2. Charlotte's Eye Smudger Brush is a domed, synthetic brush that's perfect for precise application

    2. Tilt Your Chin Up (or Down) While Applying Eye Makeup

    When you’re applying eyeshadow on your lids, lift your chin up and look down into your mirror so you can see your full eyelid. On the flip side, if you’re working on the bottom of your eyes, tilt your chin down. By doing this, you’re more likely to be able to apply your products with precision on the largest surface area of your eyes and without smudging!

    Shop eyeshadow brushes

  3. Luxury Palette in Pillow Talk Dreams with four dreamy, rosy-brown shades

    3. Apply Eyeshadow Past the Crease

    Don’t be afraid to apply eyeshadow above the crease to make eyes look lifted and wider! People with hooded eyes often have a smaller visible eyelid when looking straight on, meaning some of the eyeshadow you apply can get hidden! The trick is to apply eyeshadow a little past the eyelid, up into and past the crease, and then blend upwards and outwards! Using the Eye Blender Brush, apply your eyeshadow from side to side on the lid like a windscreen wiper, but don’t only stay on the lid, apply your favourite shades up and out!

    This can be done with both cream and powder eyeshadows! Use Eyes to Mesmerise miracle pots, which are perfectly crease-proof and super easy to use, or choose your favourite Luxury Palette to make your hooded eyes appear brighter and more beautiful than ever!

    Tilbury Tip: Eyes to Mesmerise now comes in her globally-loved shades: Walk of No Shame, the universally flattering russet-red and Pillow Talk, the pretty pink beauty secret to mesmerising, SHINE BRIGHT eyes in seconds!

    Shop Eyes to Mesmerise cream eyeshadows

    Shop Luxury Palettes

  4. Charlotte's Eye Blender Brush is a fluffy brush that's perfect for getting a seamless blend

    4. Don’t Forget the Lower Lash Line

    Bringing your eyeshadow along your lower lash line beautifully complete your look! When you’re applying to the bottom lash line, it’s important to not be heavy handed, especially if you have hooded eyes. Using the same shade you’ve applied on your upper eyelid, use the Eye Smudger Brush to lightly bring the colour along your lower lash line and don’t forget to blend, blend, blend!

    Shop the Eye Blender Brush

    Shop all eyeshadow

  5. Eyes to Mesmerise cream eyeshadow pot in glistening Rose Gold

    5. Add Sparkle to the Inner Corners

    This trick instantly opens up the look of your eyes for a brighter, wider looking, sparkling gaze!! When using your favourite Luxury Palette, use the PRIME shade in the inner corners to create the illusion of bigger, brighter-looking eyes, or use the dream-sheen, sparkling Eyes to Mesmerise cream eyeshadows for a luminous looking, wide-eyed look!

  6. Pillow Talk Eyeliner is a berry-brown pencil eyeliner inspired by Charlotte's iconic Pillow Talk shade

    6. Winged Eyeliner for Hooded Eyes: Keep Eyes Open!

    A feline flick is one of my favourite beauty secrets for bigger, brighter, lifted looking eyes! For hooded eyes, Rasheena recommends keeping your eyes open as you apply your eyeliner, so you can see where the product will be when you’re looking straight ahead.

    Start by drawing a dot about two milimeters above your upper lash line on each side of your eye so your flick will curve up at a 45-degree angle. Next, line your eyes until you connect the line straight up to the dot and over the crease. Then, with your chin up, retrace and fill in the line to make sure there are no gaps!

    Shop eyeliner

    Discover my full winged eyeliner tutorial

Share article

Related Posts